Add an Image
> Help Desk > Tutorials > Web Pages > Text Editor > Adding An Image
Adding an image in the text editor
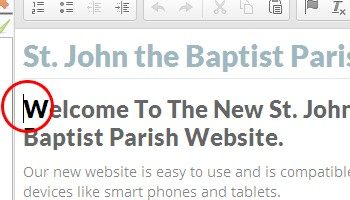
Step 1: Click Where You Want The Image To Appear

In the text editor, place your mouse's cursor where you'd like the image to appear. This one is pretty self explanatory, but the one area where it can get tricky is if you would like the image to appear to the right of some text. In this instance, you will want to position the mouse at the start of the paragraph (yep, in the top left corner). This may seem counter-intuitive, but it will make sense after you've completed this tutorial, and the "styling an image" tutorial (that's a short one).
Step 2: Add The Image
![]()
Click the "Image" icon (see above) in the text editor's toolbar.

Next, click the "Browse Server" button, which is under the "Image Info" tab (the default tab that appears). A pop-up will appear (if you have pop-up blocking software, please add your website to the list of "allowed websites").
Step 3: Select The Image
Already on server
If your image is already on the web server, you can browse to it using the folders on the left, then double-click to select it.
To be uploaded


If the image you want is not available on the server, you'll need to upload it. Navigate to the folder you wish to upload the file to (using the menu on the left), then click the "Upload" button. Select the file, then wait a few seconds (or minutes, depending on the size of the file you are uploading). Once it has successfully been uploaded to the website, you should see the file is available for selection now. Select it by double-clicking.
Resize the Image


This is an optional step. If you need to resize your image, we would typically recommend working in percentages, as images sized by percentage will scale better on mobile devices. To do this, first unlock the aspect ratio of the image by clicking the "lock" icon (to the left of the "Preview" window). Next, enter a percentage for the "Width" (don't forget the percentage sign), and leave the "Height" empty (you'll need to delete what's there already). Please note: the image in the "Preview" window might now look a bit warped & distorted - just ignore that.
All Done

Now, simply click "OK" and we're done adding an image to the text editor. Depending on what you are doing, you might be finished here. If you'd like to "style" the image with a border, or float the image to the left or right of text, continue to the next section: Styling An Image.